Instrumentation
Overview
This module introduces the basics of GENI Desktop to users, and walks them through the process of instrumentizing a slice and opening graphs and SSH sessions for the nodes.
Tutorial Time: 30-35 minutes
Objectives
Upon completing this module you will:
- Be able to use GENI Desktop to instrumentize a slice
- Be able to open SSH sessions to nodes
- Be able to open node activity graphs
- Be familiar with using GENI Desktop
Quick Instrumentation
Those who have completed this instrumentation tutorial previously, or who are already comfortable with GENI may use the following quick setup steps. Otherwise, please continue with the full tutorial below.
- Open GENI Desktop, and wait for instrumentation.
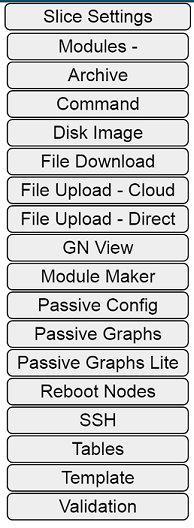
- For both nodes click the Module Launcher button (rocket), and select “SSH”, and click "Open SSH".
Tutorial
A. Slice Creation
This module assumes you have an active slice with two connected nodes. If you don't, follow the steps in the GENI Setup module, then continue here.
B. Video
If you haven't already, watch the video above. It will walk you through the steps of the module.
C. Starting GENI Desktop
1. If you already have GENI portal open, click on the Home tab and continue with step 2. Otherwise, open a browser window and go to the GENI Portal (http://portal.geni.net). Click Use GENI and log in using your institution credentials.
2. Click on the name of your slice to get to the slice page.
3. Hover over the tools button in the upper right-hand corner, and click on GENI Desktop to launch GENI Desktop.
4. You may be asked to authorize GENI Desktop to act on your behalf. Click on "Authorize the GENI Desktop", then, assuming your account is through GENI, click on the GENI logo. Finally click Authorize (optionally selecting "Remember This Decision" to avoid this step in the future). After a moment a list of your slices will be displayed. Click on the slice you want to access with GENI Desktop.
5. If you have not created a global node for your slice, GENI Desktop will prompt you to add one. Click Ok to add a Global node. It may take several minutes (often 7 or 8 minutes) for the global node to become available. Wait for the global node (GDGN0) to turn green, then continue.
6. GENI Desktop allows you to SSH to your nodes so that you can issue commands from a terminal. Additionally GENI Desktop provides tools, such as traffic graphs for your nodes. You should now see a status bar labeled "Checking Slice Status". Once completed, the slice will automatically be initialized so you can use the basic features of GENI Desktop. It may take a few minutes for the initialization to complete.
7. The slice will then be instrumentized. It may take a few minutes for the instrumentation to complete.
8. Once completed the welcome window should go away and you should see your network on the GENI Desktop.
D. Open SSH sessions using GENI Desktop
1. Select the client node by clicking its icon on the canvas. Now, click the SSH button on the left panel. From the window that opens, select Open Browser SSH. This will open an SSH session in your browser to the selected node.
2. The GEMINI Global Node (GN) runs a web server with a self signed certificate. This certificate must be accepted to interface with the global nodes, view graphs, etc. While it is not generally a good idea to accept self signed certificates, this is necessary for working with GEMINI Global Nodes. On your browser, override the safety precaution, and accept the self signed certificate. (For example, in Chrome click advanced, then click "Proceed to...").
2. Repeat the previous step for any other nodes.
E. Open graphs using GENI Desktop
1. Select the client node and click “Passive Graphs”.
2. Click LiveUpdate to enable the graphs to update.
3. Click Graphs, then Total Traffic to add the total traffic graph. Note: other modules may require different graphs. These graphs will be used in various modules and assignments.
Now that you have everything set up, you can now continue on to any of the other modules.
Shutdown
With your network established you may now continue with any of the other modules, which require this basic setup as a pre-requisite. Upon completion of the module please delete your slice's resources as described in the Shutdown module.

