Ferrari Mondial Repair Notes:
Besides the 15,000 mile tune-up and the 30,000 mile majors, there are several other things that need to be worked on to make the car right (and yes, you need to put in gas and change the oil every 3,000 miles like any real car too). It should be noted too that many of the repairs or maintenance items are identical to that of the 308 series of the same years. Being that there were far more 308 sports cars produced (about 22,000) these parts are not as difficult to come by as one might think.
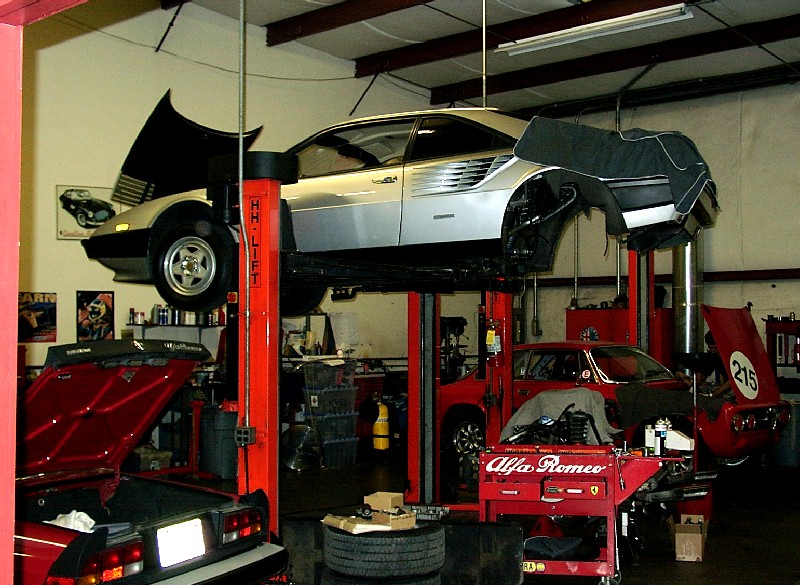
Now I don’t expect one to do what the following pictures show: this is my Mondial with the engine dropped out at Krause and England race shop for an engine going over – new belts, hoses, valve adjustment. The engine, transmission and rear suspension all drop out as one unit that makes big services like this much easier and quicker to perform. That also translates into lower repair bill costs.

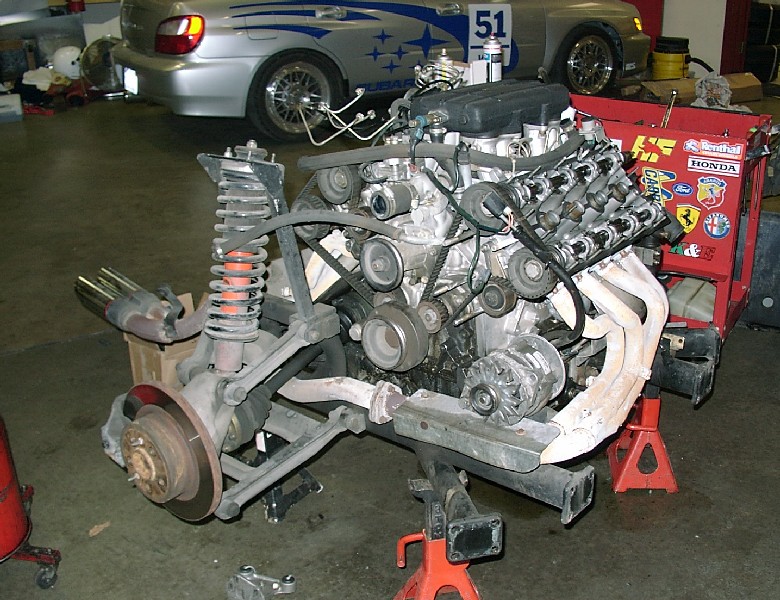
Below is a good view of the timing belts and other engine access. The valve covers have also been removed for adjusting the spacing between the cams and valves. Although not Ferraris, notice the other Italian racecars in the shop.

Now if you don’t have a lift, and I don’t but wish I had, here are some of the items one can work on themselves, if you are comfortable at it. However, I wouldn’t tackle some of these projects until one has worked on a simpler (old mustang?) or less expensive car for a while first. Mistakes are much more costly here.
Electrical System:
The main circuit board is located up front where the fuses and relays
plug into has a trace that is undersized. This trace is between the last
fuse and its output wire for the circuit that controls the turn signals and
break lights. If you notice that sometimes with the car off or when just
started that the brake lights or turn signals don't function correctly, measure
the voltage of this circuit but measuring between ground and its fuse.
Press the brake a few times and if the voltage drops below 10V then you
need to modify the circuit board. It is actually a simple solder between
two pins. I solder in a wire between the bottom pin of the fuse and its
output wire (test with an ohm meter for continuity to make sure it is right)
which is three wires down from the vertical connector. I used an 18 gauge
wire and it was happier. I will place an image and better instructions
soon when I hook up my scanner - for it is not as hard as it sounds but one can
do some major damage by soldering the wrong two pins together.
If you have intermittent turn signals and brake lights, first check the
fuse and the bulbs themselves. If
they are fine, remove the hazard light switch on the dashboard. Now take this complicated switch apart. Be careful since there are many parts
inside of it. You will notice
green corrosion on many of the copper contact surfaces. Clean these off with a very mild steel
wool or abrasive cloth to make shiny again. Put all back together.
CV boots:
Like all CV boot covers, they tear over time. And, unfortunately, I haven't found any of those simple split boots that fit. So, you are gong to have to drop the axle. It is a quite a job but it is in the manual. Make sure you have lots of shop rage because there is a lot of grease there.
If you don't have the manual here is a simplified method: get
an 8mm Allen bit for a 3/8" of 1/2 drive set, about 2' of extensions (no
joke) a ratchet and a bull bar. An impact wrench works fine on the inner
bolts.
Put the car on jack stands and remove the 6 inner and 6 outer socket
head cap screws. Some of them take LOTS of convincing. Remove the
cable from the parking brake for better access. Remove the axle.
Its really not hard, just greasy and some bolts are stubborn.
With the axle out, use a needle nose pliers in a reverse direction to
open up the "C" clip holding the splined axel shaft in. Pull
out. Now you are ready to put the replacement boots on.
Replace the rubber boot and use new clamps on both ends to
secure. While it is apart, clean out he bearings and check them over
well. If all is right, pack with grease (correct type is listed in your
manual) reinstall.
To reinstall, just repeat in reverse. Make sure you put the
washers back on for otherwise the bolts will stick out too far. And
retorque the screws the same way one would a wheel - back and forth.
However, if one tears apart the axle and finds that there is abnormal wear, which would be quite sad, you'll need to replace the CV joint. The joints are made by "Tobro" in Germany and it is model 29/81. I do not know a cross reference to another vehicle. But if anyone does, I would like to know.
Electric Windows
They are slow. Painfully slow. They go down about half the
speed of other manufacturers and go up at a snails pace. If they move,
they are working correctly. Most people I know help speed it up by
pushing on the glass. No, the cars aren't perfect. Ever year has the same problem, it was
never corrected. Best repair
method that I have heard is to bypass the fusebox under the bonnet and run the
lines directly to the battery.
Battery
You may wonder why battery is listed. However, if you look at the
location of it at the front passenger side, you may wonder if they started with
the battery and built the frame around it. To replace the battery, 1)
turn off the battery disconnect knob. 2) Remove passenger front
wheel. 3) Remove inner fender/wheel well (about 5 screws). 4)
Now you have battery access. Remove cables and replace battery.
Air Conditioning
Before you spend several hundreds of dollars to refill the Freon
12. Stop. Install one of the simple R134A conversion kits.
About $30 at the local car parts store. Follow the directions on the box
with changing the oil in the compressor, putting on new adapters (only the low
pressure side one fits but that’s OK, that the only one you really need), and
pouring in the 134A and oil in the order the say. The entire conversion
and charging the system takes only about 2 hours and ones doesn't need to even
put the car on jacks. You'll feel real good when the cold air blows from
the ducts and knowing that a refill/charge will only cost about $20 now.
Timing Belt
Never let these two belts break or you'll need a new engine!
Make sure these are changed at the 30,000 mile checkup or once every 10 years
regardless. It takes some time but it is cheap insurance overall.
However, I would recommend a professional to do this. One can do it
themselves but the risk of putting the belt on the wrong tooth can be an
expensive proposition.
Links to some other Ferrari online service and maintenance sites:
308faq (although mostly for 308, the tips are relevant for the Mondial too)
Expensive Car (many great tips on several standard maintenance items)
Eugenio's (southern Cal. Ferrari service)
Krause & England (top notch independent Ferrari shop, North Carolina)
www.ferrariforum.net (online Ferrari forums)
Ferrari Owners (Ferrari sponsored site – free owners manual for verified Ferrari owners)
Ferrari Chat (online Ferrari forums)
Ferrari Parts:
All Ferrari Parts (great place specializing in new old parts, boots and belts and ...)
T. Rutlands (wires, service
kits, boots)
If questions on your Mondial, send email to me at: keller@cs.unc.edu
For more Ferrari Mondial information, click here
Updated
January 29, 2003