COMP 14, Spring 2006
Creating a Jar File
Once you have successfully completed your programming assignment, you
will
need to create a Jar file to submit your assignment to Blackboard. This
will
help the TAs grade your assignment. You will lose points if you do
not
submit your programming assignments in a Jar file.
What's a Jar File?
Jar stands for "Java Archive". It's much like a compressed ZIP file
that you
may have used before. You'll be adding each Java source file in your
assignment (usually only one file) to a Jar file before submitting it
on
Blackboard.
Why Do I Have to Create a Jar File?
When your TA downloads your programming assignments, Blackboard
automatically
prepends the program number and your Onyen to the filename of the Java
source
file you've submitted. Remember that Java requires that the file name
of the
Java source code and the main class name be the same. This renaming by
Blackboard causes your TA to be unable to compile your assignment.
If you create a Jar file that contains the appropriately named Java
source
file, Blackboard will rename only the Jar file, not the Java source
file.
This allows your TA to easily compile and run your program.
How Do I Create a Jar File?
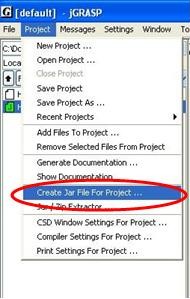
<>After you've successfully compiled, run, tested, and commented
your program, choose Create Jar File For Project... from the Project
menu in jGRASP. In some versions of jGRASP, you get to the Create Jar File For Project item by
selecting the Project menu,
then selecting Active Project.
If Active Project is dim, then
you need to open your project. Just right click on the project
file (the file with the gpj suffix) and select Open.
- The
Create Jar File for Project (default) window should
open.
Make sure that the boxes labeled Project
File and Sources are
checked and that the others are not checked. This should put your
project file (.gpj) and all your source files (.java) into the upper
window. This is usually all you need to include in your Jar
file. If you need to add any other files (e.g. data files), use Add (below).
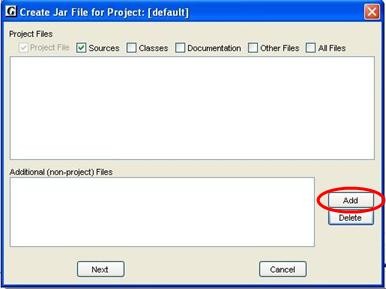
- Click Add to add
additional files to your Jar file. A file dialog box will open.
Choose each file you want to add to
the
Jar file and click Add. You should add only the Java source
files
(ending in .java). Once you have added the files, click Cancel
in the
file dialog box.
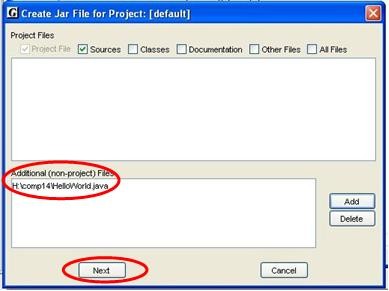
-
After the file dialog box closes, you should be back to the Create
Jar File for Project (default) window. The files that you want
included in your Jar file
should be displayed. After
you
have double-checked that you have the appropriate files, click Next
to continue creating the Jar file.
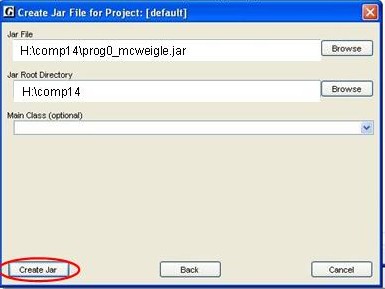
- A new window will
open asking for the name of the Jar file to
create.
You should name the file progN_onyen.jar, where N
is the
programming assignment number and onyen is your Onyen. Make
sure that
the Jar file ends in .jar and that the file is being created in the
same
folder as your Java source files. Once you have appropriately named
your
Jar file, click Create Jar.
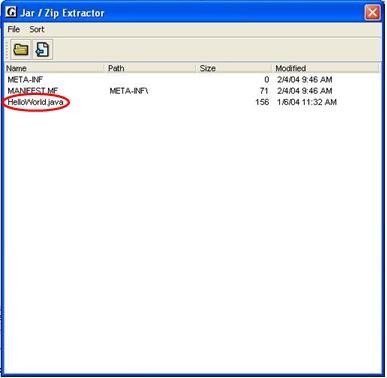
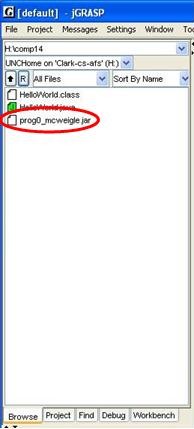
- After the Jar File has been created, click the R button
in the Browse window to the left. This will refresh the list of
files in your
current folder. Your newly-created Jar file should appear in the list.
- If you have problems creating a Jar file, contact a COMP 114
Teaching Assistant.