How to make a new game
We also have step-by-step instructions for making a new game.
Hark the Sound now includes a built-in game editor that will allow you to customize existing games and to create new games of your own. To modify an existing game, use the arrow keys as usual to start the game. Then press the “Game” button. A dialog will popup that looks like this:
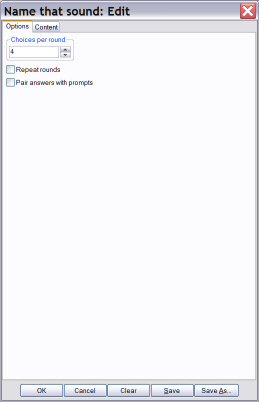
The “Options” tab has controls for controlling game play; these were described earlier. The “Content” tab has controls for manipulating the actual content of the game.
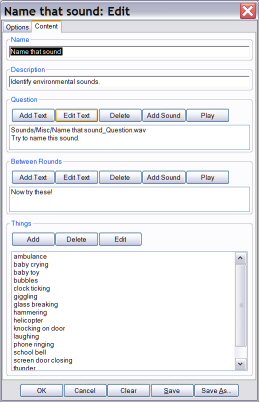
You may change the name, description, question, and other particulars of the game. Items in the Question and Between Rounds boxes may be text, which will be spoken, or a sound file, which will be played. Selecting the “add” button will add a new item to the list. You may also modify a category by clicking on it and then select the “edit” or “delete” button. Choosing the “edit” button will yield a new pop-up menu with options to edit the answer choices. You may also associate a sound file with a choice in this menu. Picking the “delete” button will delete that particular category of answers from the game.
The Things box contains the items for the game. You can add or delete items and you can edit existing items. Selecting “ambulance” and clicking Edit produces a dialog that looks like this:
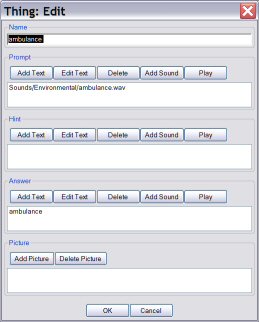
You may modify the Name, Prompt (what the student has to identify), the Hint (a clue that is given when the student hits the down arrow key), the Answer (the response that the student chooses), and the Picture. Everything except the Name and the Prompt is optional. With creative use of these fields you can produce a wide variety of games using sound files and text.
To create a new game, you use the same tools. First use the arrow keys to start a game that is similar to the game you want to make. For example if you want to make a new Category game you should choose either Learn About Food Groups or Wal-Mart Categories. After you click the Game button to activate the editor, select the Clear button at the bottom of the dialog. This will clear all the controls to give you a blank slate for your new game. Fill in the Name, Description, Question, Between Rounds items and then add Things to the game.
When you are done you should click the Save button to save your work. You’ll see a standard File dialog that will allow you to enter a name for the game and a place to save it. In the File dialog you can move between folders or even create a new folder to hold your games. Organizing games for particular students in folders with their names will make it easy to find their games.