Assignment 3 - Drawing Shapes
Due: Friday, January 24, 2020, at start of class
You may work alone or with a partner, but you must type up the code yourself. You may also discuss the assignment at a high level with other students. You should list any student with whom you discussed the assignment, and the manner of discussion (high-level, partner, etc.) in a readme.txt file that you include with your submission.
You should submit your assignment as a .zip file on Moodle.
Parts of this assignment:
Note on style:
The following style guidelines are expected moving forward, and will typically constitute 5-10 points of each assignment (out of 100 points).
- Variable names should be clear and easy to understand, should not start with a capital letter, and should only be a single letter when appropriate (usually for
i,j, andkas indices, potentially forxandyas coordinates, and maybepas a point,cfor a circle,rfor a rectangle, etc.). - It’s good to use empty lines to break code into logical chunks.
- Comments should be used for anything complex, and typically for chunks of 3-5 lines of code, but not every line.
- Don’t leave extra print statements in the code, even if you left them commented out.
- Make sure not to have code that computes the right answer by doing extra work (e.g., leaving a computation in a for loop when it could have occurred after the for loop, only once).
Note: The example triangle-drawing program on page 108 of the textbook demonstrates a great use of empty lines and comments, and has very clear variable names. It is a good model to follow for style.
Problem 1: Making a picture
# You should be equipped to complete this problem after lesson 7 (Monday Jan. 20).
In this problem, you will guide the user through making a picture. For example, your program could instruct a user to make a house by following these steps:
- Click twice, indicating two corners of a rectangle for the house.
- Click once, indicating the center point of the top edge of the door, which has width 1⁄5 that of the entire house.
- Click once, indicating the center point of a circular window that has diameter half the width of the door.
- Click once, indicating the peak of the roof.
An example interaction might be the following sequence:

There should also be a text display at the bottom of the window, explaining the different steps to the user. You can see exercise 2 from Lesson 7 for an example. In that exercise, we asked the user to click three points to form a triangle, which was then drawn to the screen.
You can design any type of picture you want, as long as it follows these guidelines:
- There must be at least three different shapes used (different classes in
graphics.py). - You must set at least three attributes between all of the shapes (ex: fill color, outline color, border width).
- You must require at least five clicks from the user.
Your code should be saved in a file called picture.py. You should also include a screenshot of an example of your final picture after running your program in picture.png.
Problem 2: Placing checkers pieces
# You should be equipped to complete this problem after lesson 7 (Monday Jan. 20).
For this problem, you will display a grid representing a game board (like in checkers or chess, but you don’t need to color the grid locations red/black). You will be randomly selecting where to place pieces such that there is one piece per row.
You should start by practicing displaying a grid. As mentioned briefly at the end of lesson 7 on Monday, you can use the setCoords method of the GraphWin class to change the coordinate system to one you’re likely more familiar with.
Here is an example not changing the coordinates (assume graphics has already been imported):
    win = GraphWin("Regular Coordinates", 400, 300)

    # Draw an arrow
    p1 = Point(100, 100)
    p2 = Point(300, 200)
    line = Line(p1, p2)
    line.setArrow("last")
    line.draw(win)

    win.getMouse()
    win.close()
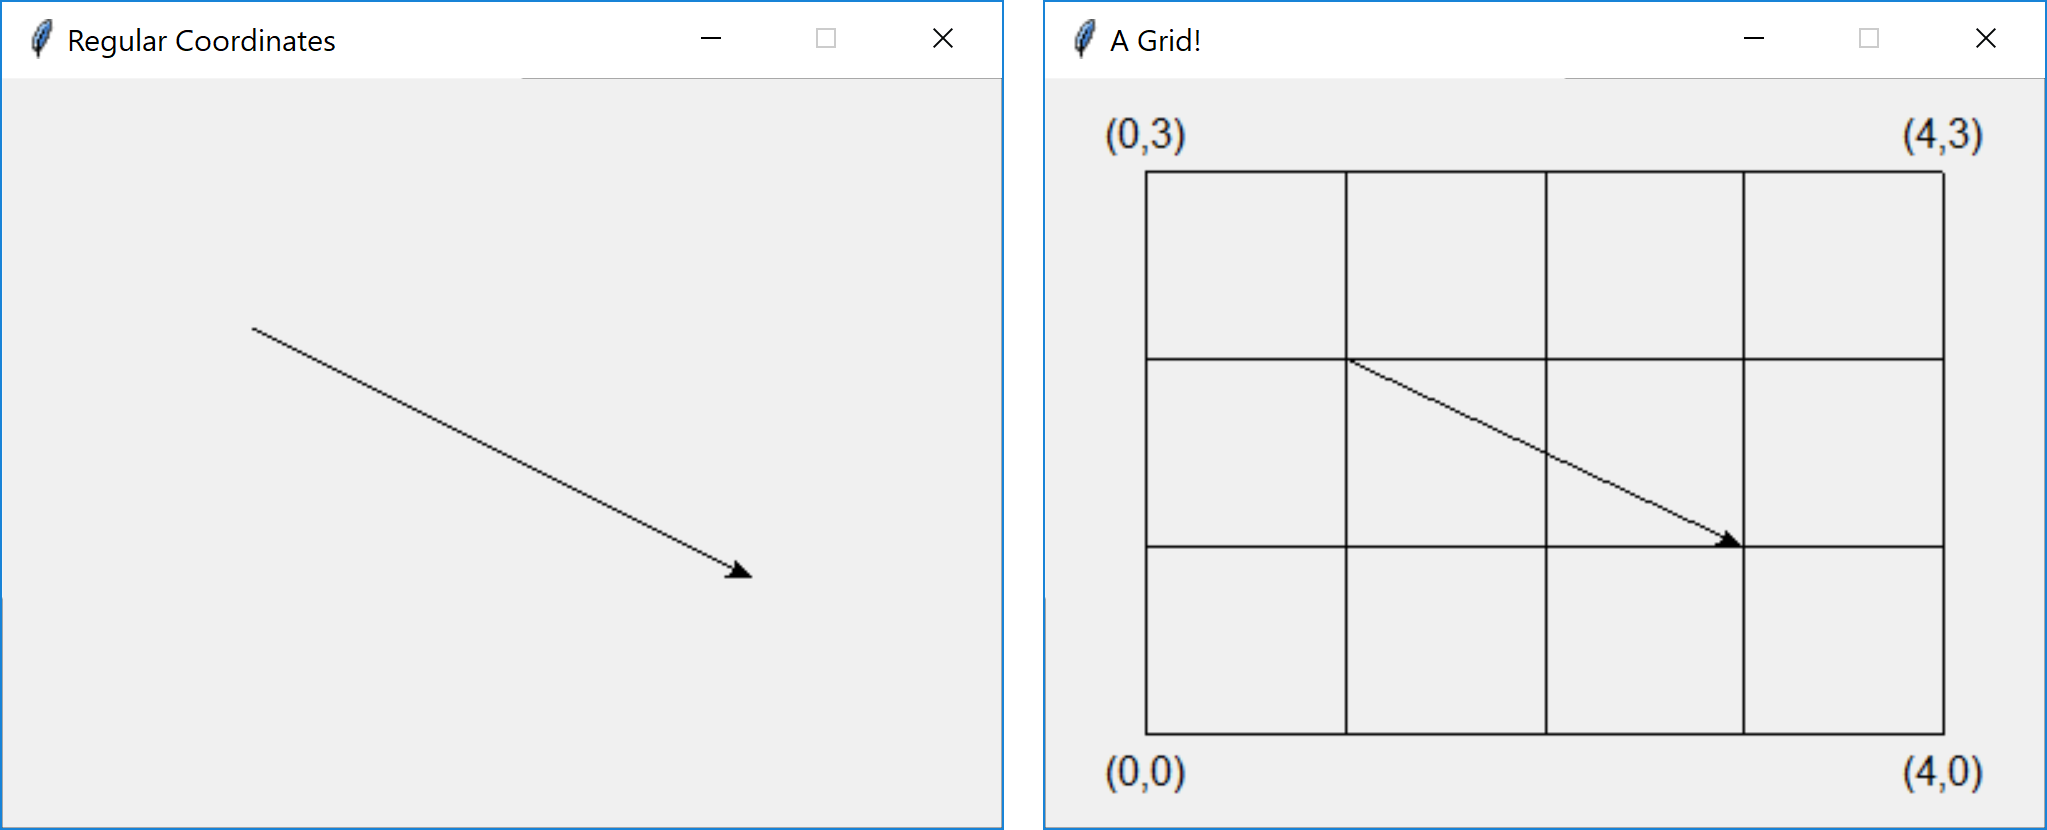
This is the result, alongside that of a program that also draws a grid (see below):

You can get the same arrow but use coordinates you’re more familiar with by using the setCoords method of the GraphWin class. To use this method, you should provide, in order, the minimum x, minimum y, maximum x, and maximum y values of the window. Here is an example of drawing the same arrow but changing the coordinates to what you might be used to:
    win = GraphWin("Modified Coordinates", 400, 300)
    win.setCoords(0.0, 0.0, 4.0, 3.0)

    # Draw an arrow
    p1 = Point(1, 2)
    p2 = Point(3, 1)
    line = Line(p1, p2)
    line.setArrow("last")
    line.draw(win)

    win.getMouse()
    win.close()
Notice how the first point for the arrow is at (1,2) rather than (100,100). This is because instead of the bottom of the window being y=300, in the new coordinate system, the bottom is y=0 and the top is y=3.
You are now ready to draw the grid! Here is a snippet of code that uses a modified coordinate system to generate a grid. Note that setCoords is called with slightly different values to provide a little buffer on either side. The result is shown on the right, above.
    win = GraphWin("A Grid!", 400, 300)
    win.setCoords(-0.5, -0.5, 4.5, 3.5)

    # Draw some vertical lines
    x = 0
    y1 = 0
    y2 = 3
    line = Line(Point(x, y1), Point(x, y2))
    line.draw(win)

    x = 1
    y1 = 0
    y2 = 3
    line = Line(Point(x, y1), Point(x, y2))
    line.draw(win)

    ...

    # Draw some horizontal lines
    x1 = 0
    x2 = 4
    y = 0
    line = Line(Point(x1, y), Point(x2, y))
    line.draw(win)

    ...

    # Draw an arrow
    p1 = Point(1, 2)
    p2 = Point(3, 1)
    line = Line(p1, p2)
    line.setArrow("last")
    line.draw(win)

    # Add some helpful labels
    blLabel = Text(Point(0, -0.2), "(0,0)")
    blLabel.draw(win)

    brLabel = Text(Point(4, -0.2), "(4,0)")
    brLabel.draw(win)

    ulLabel = Text(Point(0, 3.2), "(0,3)")
    ulLabel.draw(win)

    urLabel = Text(Point(4, 3.2), "(4,3)")
    urLabel.draw(win)

    win.getMouse()
    win.close()
2a: Random placement
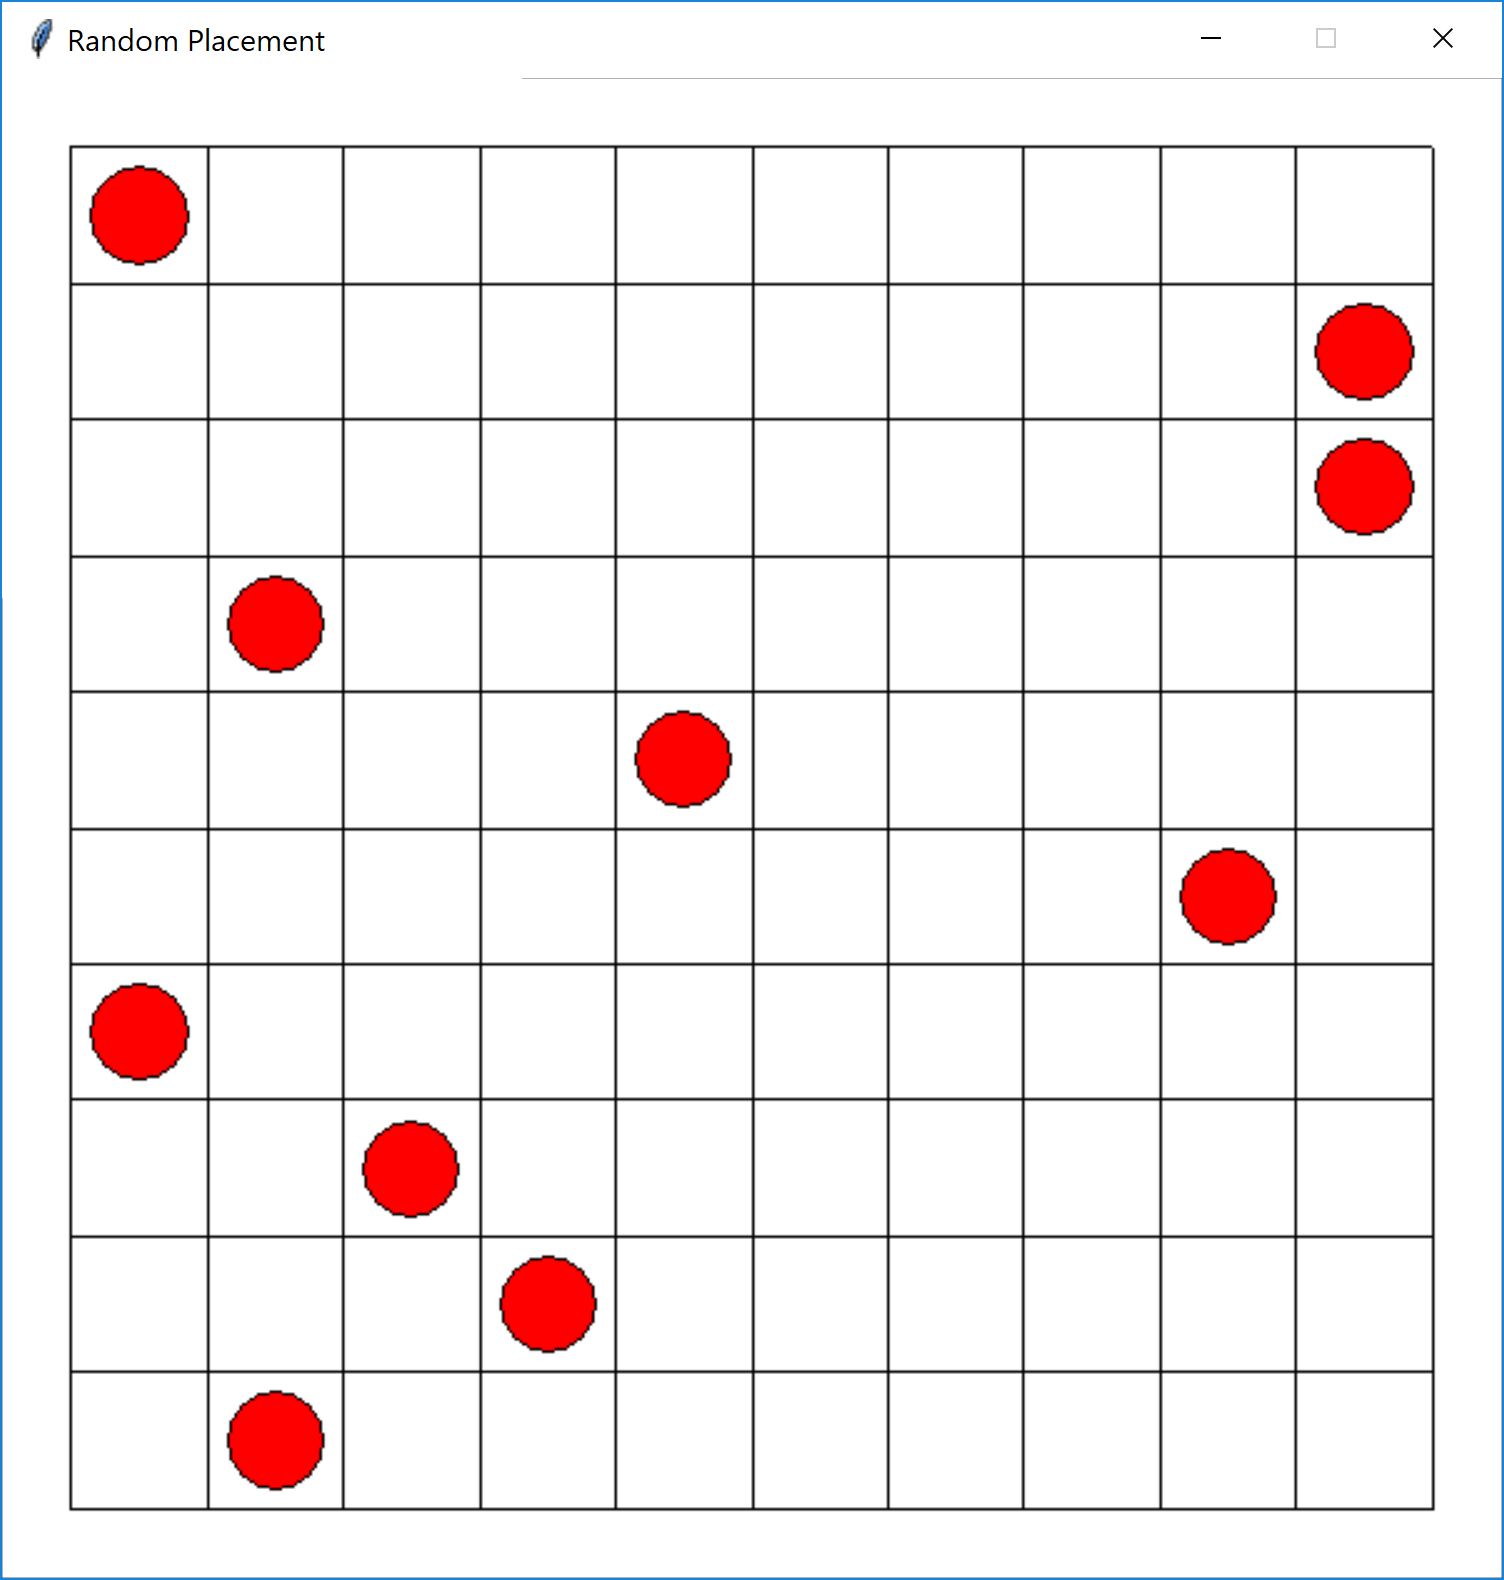
For this problem, your program should first ask the user how many grid cells there are (let’s call this n), and then draw an nxn grid. For each row, you should choose a random column to put a checker piece, and draw a red circle there. A radius of 0.35 times a grid cell size seems to look good.
Save your program in a file called randomPieces.py.
Here is a possible output:

Note that although you should only have one piece per row, there might be repeats in the columns, or empty columns.
2b: Placing Rooks
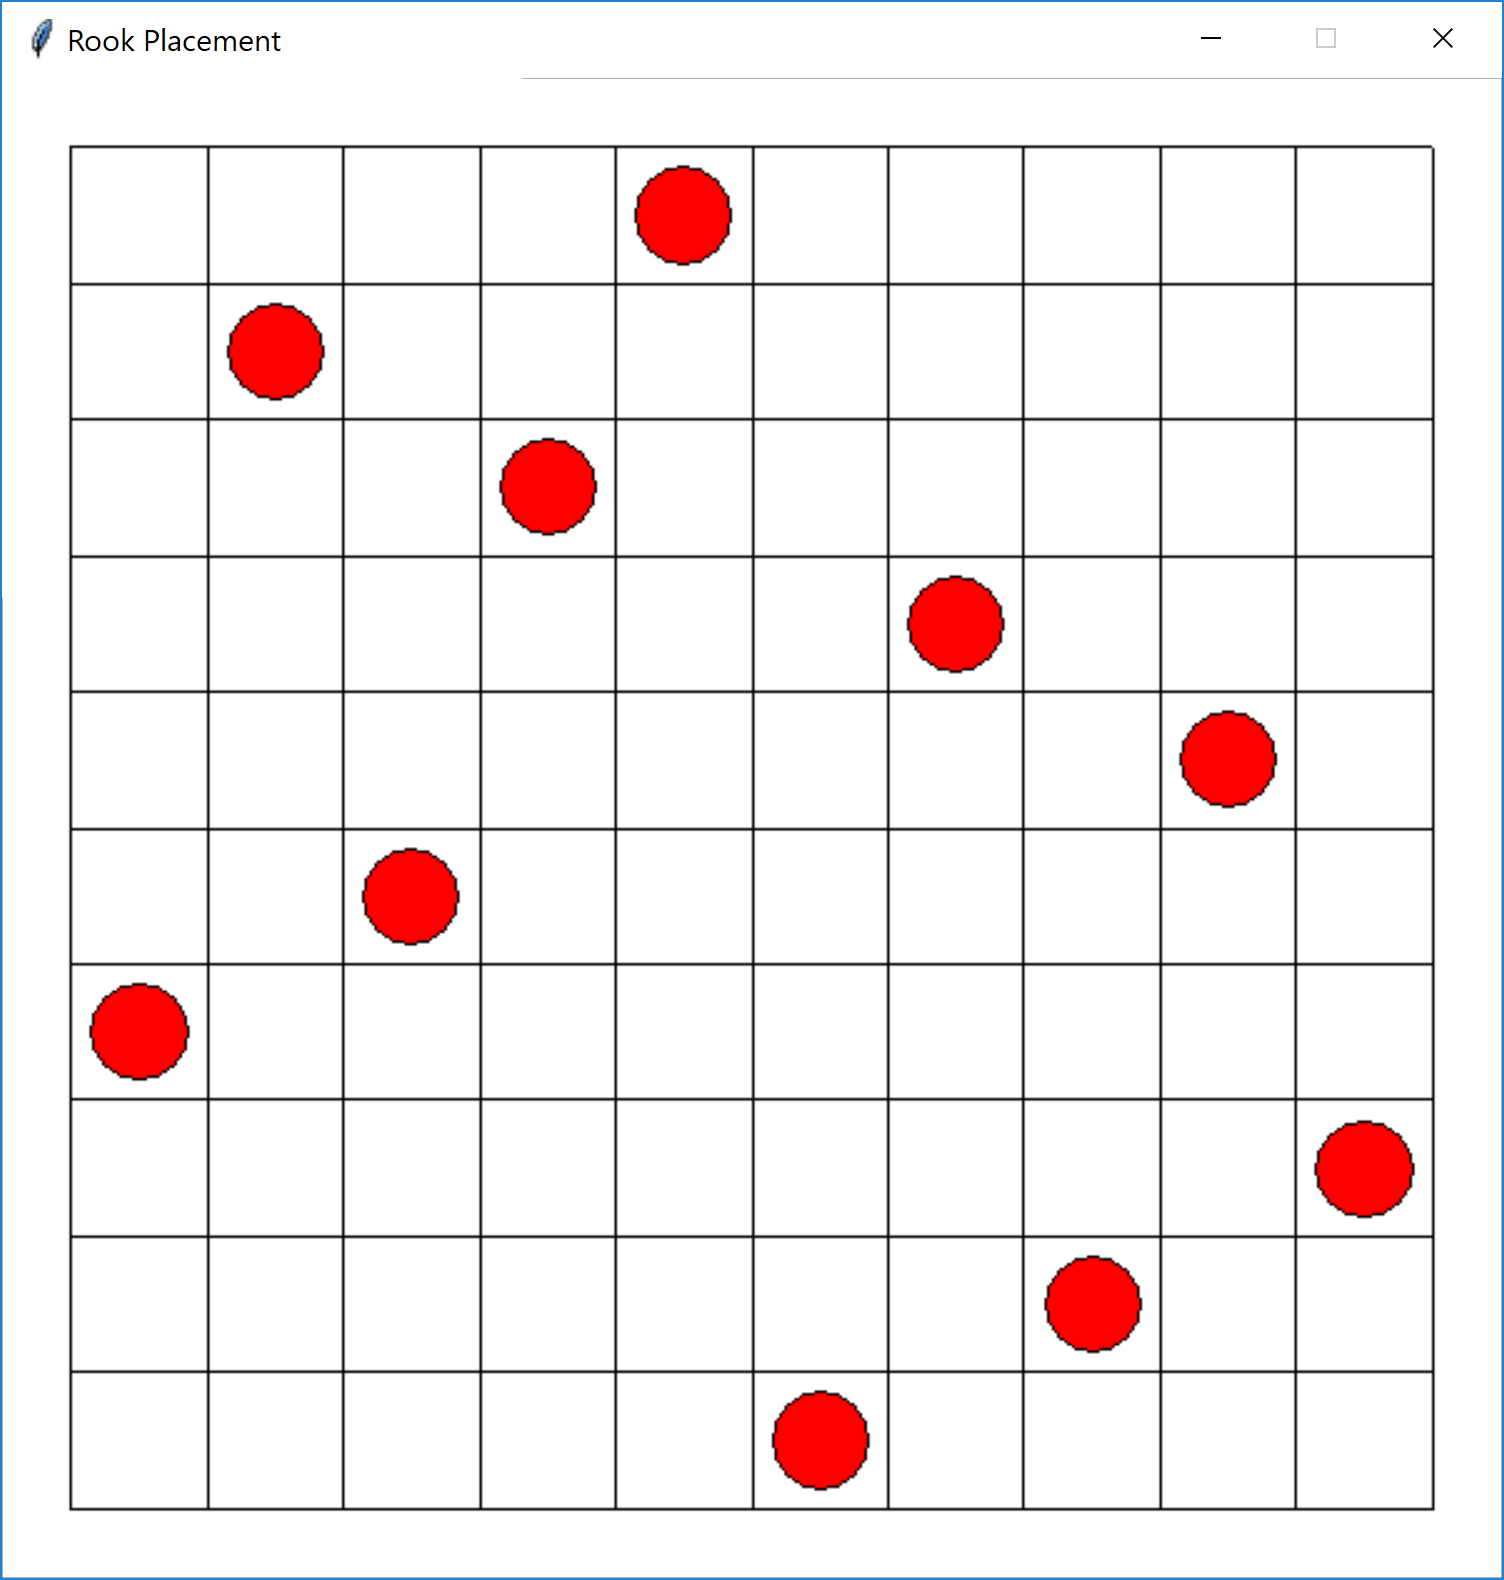
In this part, you should make sure that no two pieces are in the same column. The rest should be the same. Save your program in a file called nRooks.py.
Hint: Think carefully about how you can store the location of each piece – you need one piece per row. Perhaps there is a good data structure that would hold a bunch of information, say maybe for each row, the column of the piece. You could then randomly generate that information in such a way that the columns are assigned randomly…
Here is a possible output:

What you should submit
You should submit a single .zip file on Moodle. It should contain the following files:
readme.txt(collaboration statement listing collaborators and form of collaboration)picture.py(problem 1)picture.png(example result from problem 1)randomPieces.py(problem 2a)nRooks.py(problem 2b)