[Optional Extension] Assignment 5 - Image Processing
Due: Wednesday, March 11, 2020, at 5pm
You may work alone or with a partner, but you must type up the code yourself. You may also discuss the assignment at a high level with other students. You should list any student with whom you discussed the assignment, and the manner of discussion (high-level, partner, etc.) in a readme.txt file that you include with your submission.
You should submit your assignment as a .zip file on Moodle.
You will be extending your original imageProcessing.py code. It would be a good idea to copy your original code to a imageProcessingExtension.py file, and work in that file.
Parts of this assignment:
Note on style:
The following style guidelines are expected moving forward, and will typically constitute 5-10 points of each assignment (out of 100 points).
- Variable names should be clear and easy to understand, should not start with a capital letter, and should only be a single letter when appropriate (usually for
i,j, andkas indices, potentially forxandyas coordinates, and maybepas a point,cfor a circle,rfor a rectangle, etc.). - It’s good to use empty lines to break code into logical chunks.
- Comments should be used for anything complex, and typically for chunks of 3-5 lines of code, but not every line.
- Don’t leave extra print statements in the code, even if you left them commented out.
- Make sure not to have code that computes the right answer by doing extra work (e.g., leaving a computation in a for loop when it could have occurred after the for loop, only once).
Note: The example triangle-drawing program on page 108 of the textbook demonstrates a great use of empty lines and comments, and has very clear variable names. It is a good model to follow for style.
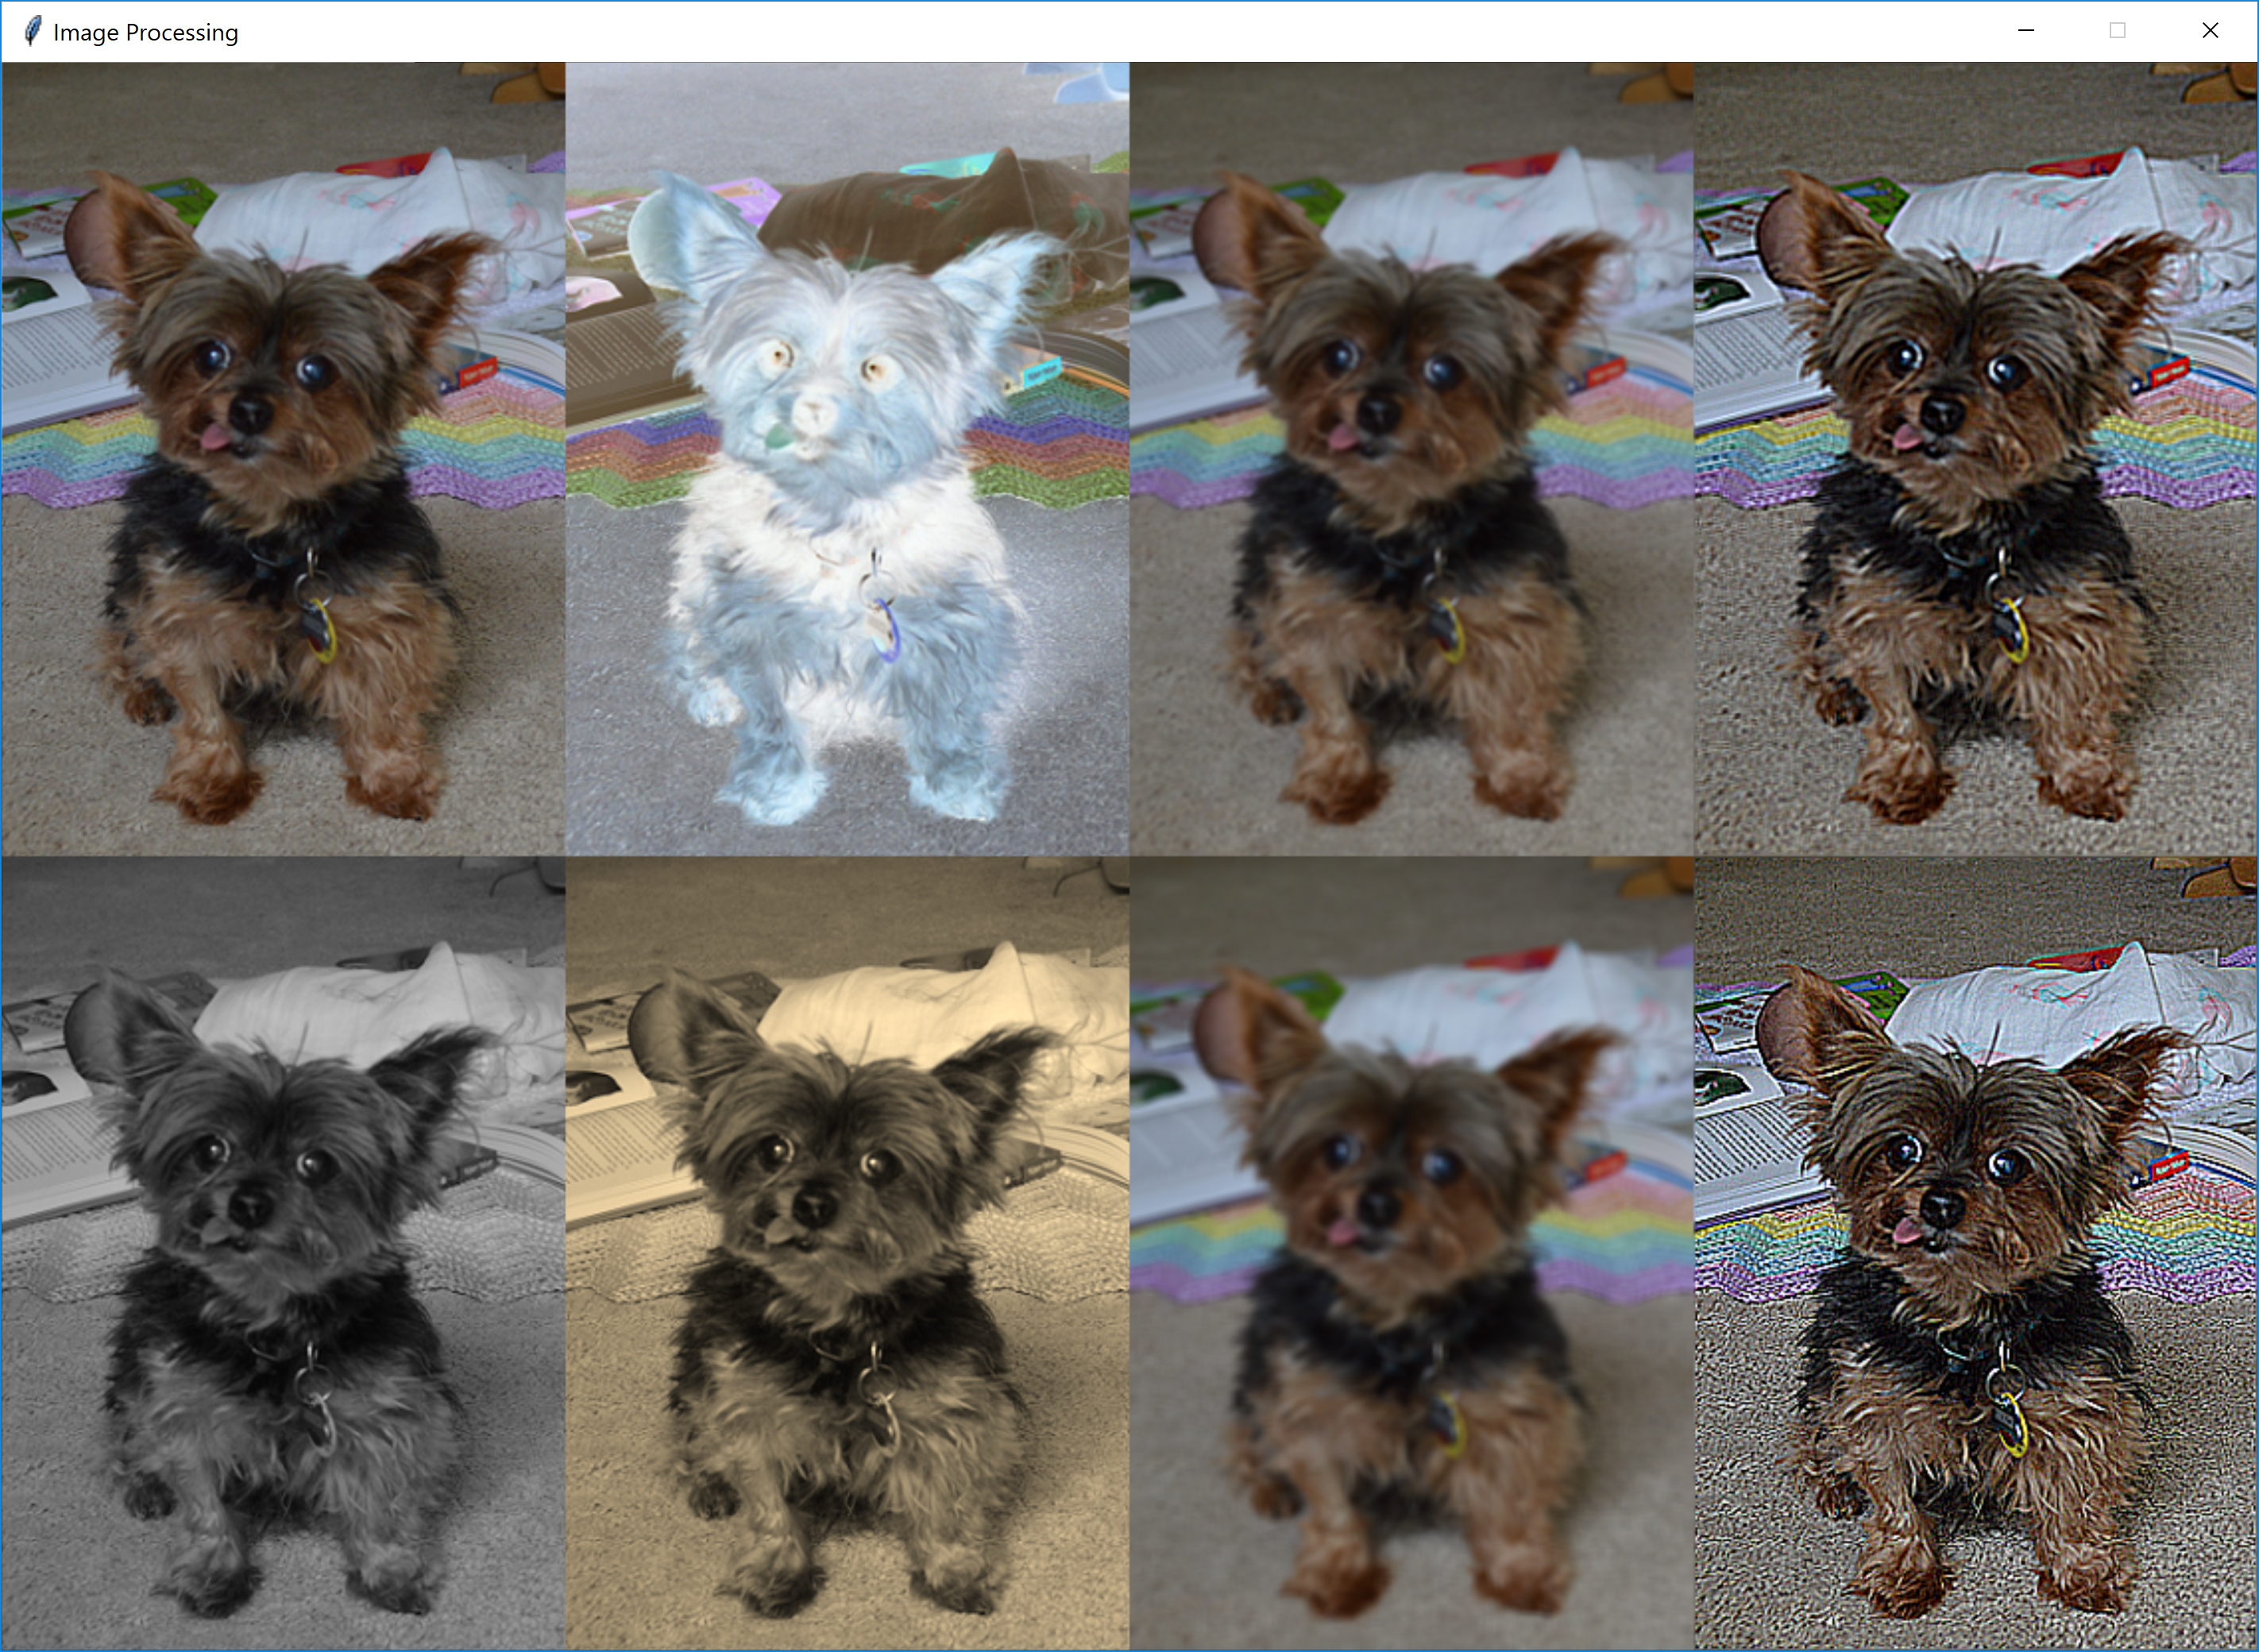
Here is an example image after you have completed all parts of this assignment. Make sure to try it out on an image of your own! (Note that it seems that the image has to be a .gif or maybe a .png file unless you install additional libraries.) Also, it’s a good idea to use fairly small images for this assignment, so you can view all six versions of the image at once. An image no larger than 400x300 would be a good choice – you can use many freely available programs to resize an image.

Problem 1: Generalizing image processing
We discussed in class that the get<Something>Color functions serve as examples of polymorphism: all take in an image and the x and y coordinates of a pixel and return a color. Replace your create<Something>Image functions with a single function that takes a getColorFunc function as a new parameter and returns the new image.
Make sure to always use the original image when calling the getColorFunc function!
Add this to your program, remove the existing create<Something>Image functions, and then “refactor” your program to call the createImage function instead:
def createImage(origImage, getColorFunc):
    """
    Creates a copy of the original image, and recolors the copy using
    getColorFunc for each pixel in the original image.

    returns: the new image
    """
    return None # TODO: implement me!
Problem 2: Sharpening an image
Now, you will implement a new get<Something>Color function to sharpen an image.
Add a function getSharpColor that sharpens an image by performing a weighted average (unlike your blurring approach from the original assignment). It should multiply the color at (x,y) by 9, and subtract each of the surrounding pixels’ colors. Make sure to ensure that each color value ends up in the range 0 to 255. (You can think of blurring as weighting each of the nine pixels by +1⁄9.)
Note: you do not have to handle borders. If the pixel is on the border, just return the original color.
def getSharpColor(image, x, y):
    """
    Chooses a color to sharpen an image by taking a weighted
    average across each color channel (R/G/B) of the 3x3 square
    of pixels centered at (x,y).  The pixel (x,y) is weighted
    with +9, and the eight neighbors are weighted with -1.

    Note that if the pixel (x,y) is on the border of the image,
    it just returns the original color.

    returns: the result of color_rgb
    """
    # If this pixel is on a border, just return the original color

    # Weight this pixel with +9

    # Weight its eight neighbors with -1

    # Make sure each color value is in the range 0..255,
    # and return the color

    return None # TODO: implement this function!
You can change your main function to the following to try out this new functionality:
def main():
    # Load the original image
    image = Image(Point(0,0), "theresephotobomb.png")
    width = image.getWidth()
    height = image.getHeight()

    # Create the window to display both images
    win = GraphWin("Image Processing", width*4, height*2)

    # Draw the original image
    image.move(width/2, height/2)
    image.draw(win)

    # Create the grayscale image
    grayscaleImage = createImage(image, getGrayscaleColor)
    grayscaleImage.move(0, height)
    grayscaleImage.draw(win)

    # Create the inverse image
    inverseImage = createImage(image, getInverseColor)
    inverseImage.move(width, 0)
    inverseImage.draw(win)

    # Create the sepia image
    sepiaImage = createImage(image, getSepiaColor)
    sepiaImage.move(width, height)
    sepiaImage.draw(win)

    # Create the blurry image
    blurryImage = createImage(image, getBlurryColor)
    blurryImage.move(width*2, 0)
    blurryImage.draw(win)

    # Create the blurred image
    blurrierImage = createImage(image, getBlurrierColor)
    blurrierImage.move(width*2, height)
    blurrierImage.draw(win)

    # Create the sharpened version of the blurred image
    deblurredImage = createImage(blurryImage, getSharpColor)
    deblurredImage.move(width, 0)
    deblurredImage.draw(win)

    # Create the sharpened version of the original image
    sharpenedImage = createImage(image, getSharpColor)
    sharpenedImage.move(width*3, height)
    sharpenedImage.draw(win)
What you should submit
You should submit a single .zip file on Moodle. It should contain the following files:
readme.txt(collaboration statement listing collaborators and form of collaboration)imageProcessingExtension.py(all problems – note the changed filename)